Quick Start Guide: Installing Ansys 2025 R1 for Research via CADpass Client Secure Connection
CQSG-00106
V1.0
Licensing Requirements or Restrictions
Usage terms and conditions apply to this software. For more information, refer to Licensing Requirements or Restrictions on the associated product page:
CADpass client secure connection (will be referred to as CADpass client or CADpass in this document) is a utility provided by CMC Microsystems that creates a secure connection between client PCs, workstations, and computer sessions, and the CMC-managed infrastructure.
This quick start guide is provided to help subscribers install and run Ansys applications in the “Mechanical and CFD” and “Electronics Suite” bundles. These instructions are for a Windows 11, 64-bit operating system using CMC Microsystems’ CADpass to access shared licenses on the CMC License Management System (LMS).
You must complete all required agreements for this software use, which may be obtained from CMC Technical Support.
You must have administrator rights for the workstation on which you are installing this software.
You must have a unique login name (Linux or Windows) that does not contain a blank space. A username such as “charlie brown” contains a space, while usernames such as “charlie.brown” or “charlie_brown” do not contain spaces.
The following are examples of unacceptable login names because they are not unique: “admin”, ”administrator”, ”root”, ”sysadm”, ”user”, ”owner”, ”student”, ”guest”, “temp”, and ”system”.
Setting up CADpass Client for Use with Ansys Academic Research Software
CADpass client is a CMC Microsystems’ license access client used by subscribers across Canada to connect to our secure license server(s).
Follow the instructions in the CADpass quick start guide to download and install the CADpass client.
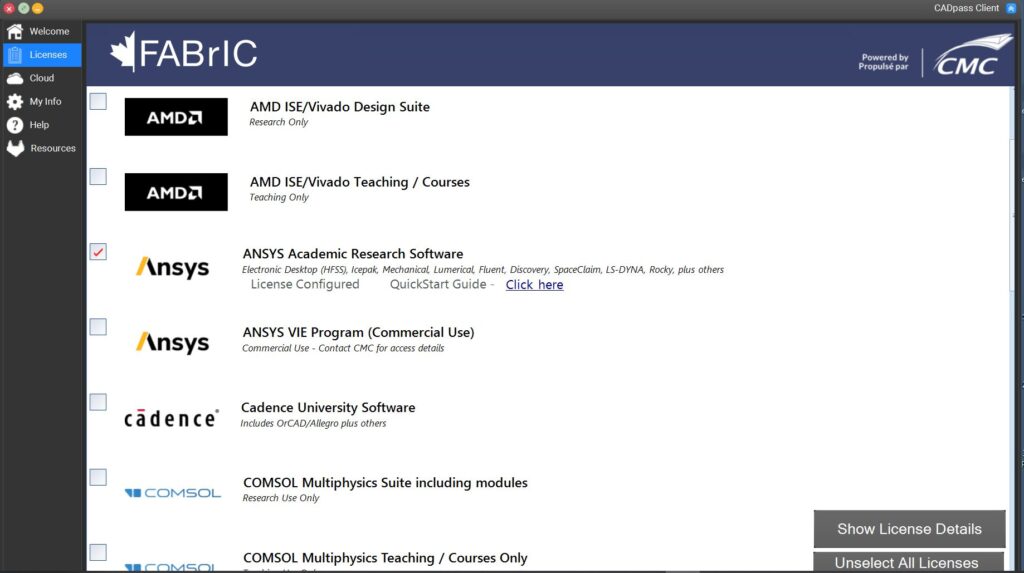
Startthe CADpass clientand log in using your CMC MicrosystemsUsernameandPassword.
When the CAD access window appears, double-clickAnsys for Academics.
A red checkmark appears next to the entry, as shown in Figure 1. Leave this checked while you are using the software.
Figure 1: Ansys for Academics Entry in CADpass Client with a License Configured
Obtaining the Software
To obtain the latest Ansys software from CMC Microsystems, please retrieve this archive from our website
Note: In this download, CMC Microsystems staff provides the entire archive to its subscribers. This archive combines all the Ansys modules for which we lease licence features.
Windows 11: This archive is in the form of seven (7) *.iso files, for a combined file size of about 60 GB. To open this archive, an additional 55 GB of disk space is required, for a total of about 120 GB.
If you want only the Electronics 2025 R1 module (~10 GB), open a support case with us, and we will send you a separate e-mail with download instructions.
Installing the Software
You want to install the following software:
Ansys 2025 R1 software
Before installing the Ansys Software
Start the CADpass client and log in using your CMC Microsystems Username and Password.
Download the installer archive.
Extract this archive into a separate temporary folder.
To install the Ansys software
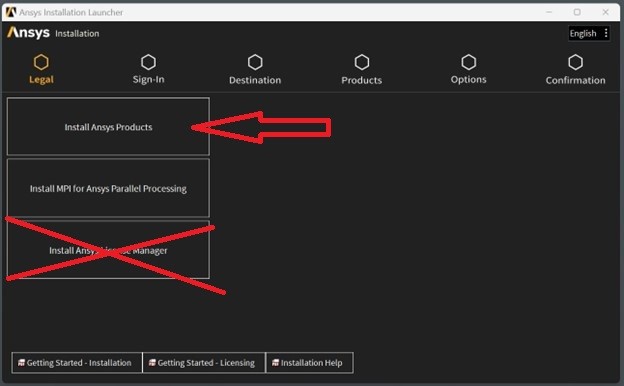
In the temporary folder, open the Disk 1 archive and double-click setup.exe. The window Ansys installation appears, as shown in Figure 2.
Figure 2 : The Ansys Installation Launcher
Click Install Ansys Products.
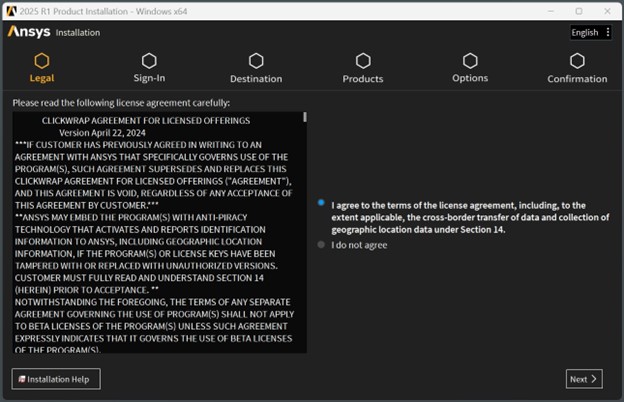
Figure 3: The Ansys Licence Agreement Dialogue
In the next window, read the CLICKWRAP software license agreement, as seen in Figure 3.
If you agree to the terms, select I agree to the terms…, and click Next.
Note: To learn more about your obligations under this agreement, contact [email protected]. If you do not want to continue, click Exit in the lower right-hand corner to end this installation.
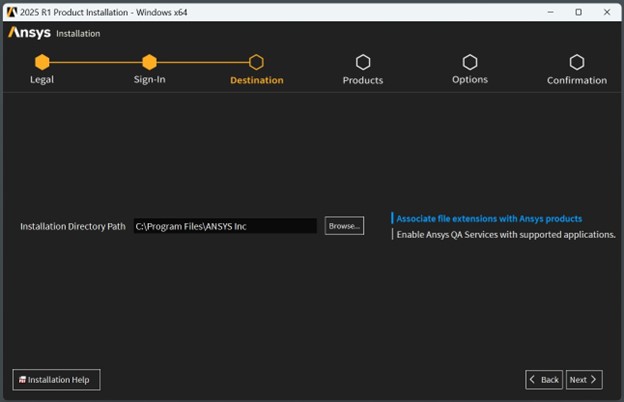
In the next window, select your installation directory and click Next to continue as shown in Figure 4.
Figure 4 : The Ansys Installation Directory Path Dialogue
In the next window, you may see a warning from Windows Security as shown in Figure 5. You must open certain ports in your local workstation firewall to allow Ansys software to run. Contact your local IT department to confirm the level of security that corresponds to your department’s security policy.
Figure 5: The Windows 11 Firewall Security Settings Dialogue
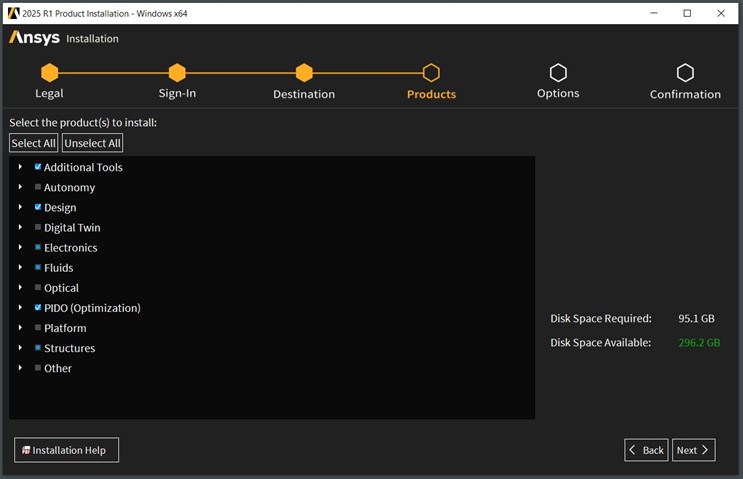
In the next window, specify which parts of the bundle you want to install, and click Next to continue, as shown in Figure 6.
Figure 6: The Ansys Product Selection Dialogue
Click Next when you have made your selections.
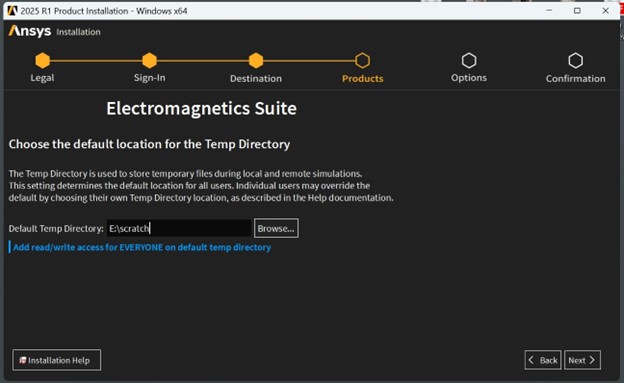
Choose the location of your temporary/scratch directory and click Next to continue, as shown in Figure 7.
Figure 7: The Scratch Temp Directory Location Dialogue
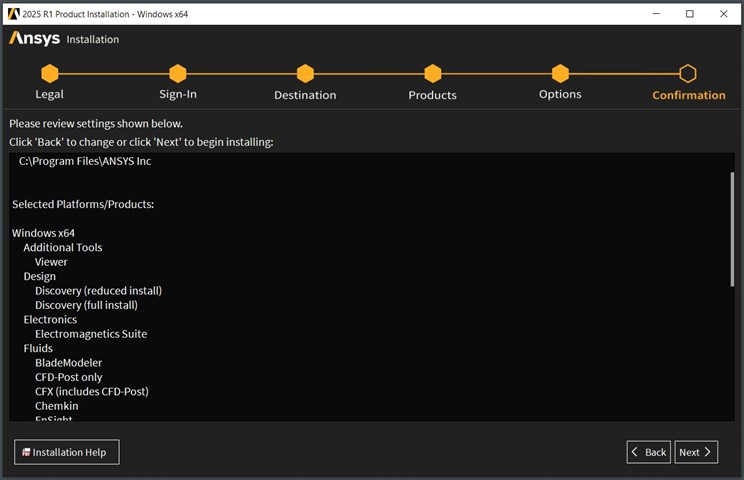
If you are satisfied with the summary of the installation to be performed, click Next. If you want to make changes, click Back to return to the previous windows and alter your selections. The Installation Summary Dialogue is shown in Figure 8.
Figure 8: The Ansys Installation Summary Dialogue
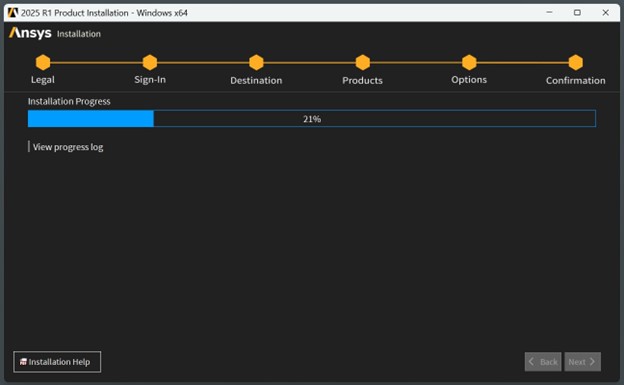
Depending upon the number of modules you selected and the hardware in your computer, installation could take an hour or more to complete. The Ansys installer displays the progress during your installation, as shown in Figure 9.
Figure 9: The Ansys Progress Installation Dialogue
When the installation is complete, the progress bar shows 100%.Click Next.
The message Installation Complete is displayed, as shown in Figure 10. Completing the Ansys survey is optional.
Click Exit to close the installer.
Figure 10: The Ansys Installation Summary
Important Note:
Do not install the Ansys License Manager software on your computer. It will block the CMC Microsystems’ AppGate client from reaching the Ansys license server ports. See Figure 2 for the location of this installer link.
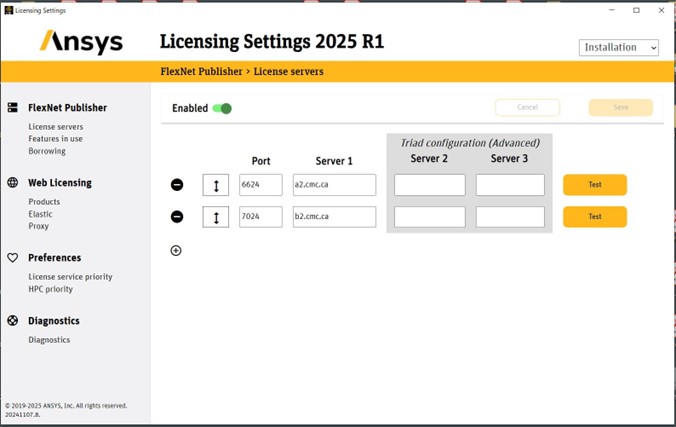
The dialogue Licensing Settings appears. You should see two ports and two server addresses listed, as shown in Figure 11. If you do not, close the License Settings dialogue and proceed to the section Setting up Ansys 2025 Licence Access and follow the steps.
Figure 11. Licensing Settings Dialogue for Ansys 2025
If these entries look correct, close this window, and proceed to the section To Test your Ansys Installation below.
Setting up Ansys 2025 License Access
Navigate to Start | Ansys 2025 | and click Ansys Licensing Settings 2025.
Select Run as Administrator.
Under the FlexNet Publisher title, select License servers.
In the License Utility GUI, select Add Server Machine Specification.
Use the license address as follows:
Port: 6624
Server1: a2.cmc.ca, as shown in Figure 11.
Click Save to accept these settings and close the window.
Testing the Installation
Ensure that you have the AppGate client running and have the appropriate CADpass entry checked, as shown in Figure 1.
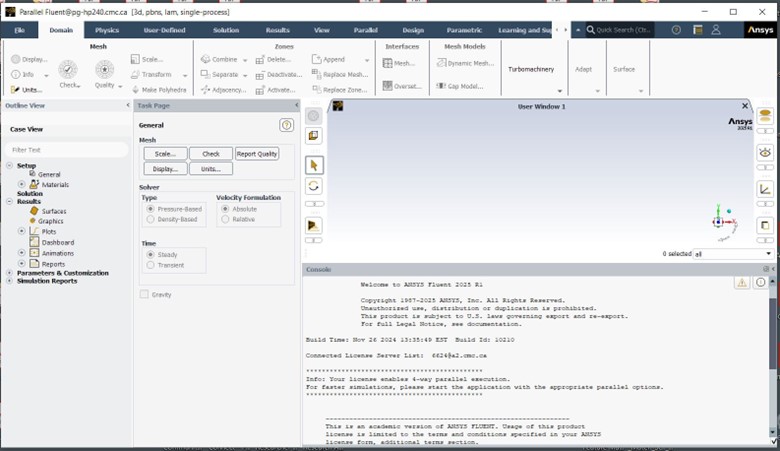
Select an application from your main Windows menu.
For example, Start menu | Ansys 2025 | Fluent 2025 or SpaceClaim 2025, as shown in Figure 12. If this module starts and runs, then your installation is successful.
Figure 12: Ansys Fluent 2025 Main Window
Does your research benefit from products and services provided by CMC Microsystems?