This document is a companion document for the Cadence iLS training course Virtuoso® Layout Design Basics (VLDB) vIC 6.1.7. It is meant to be reviewed, along with the training course materials from Cadence, for how to complete the lab materials using the CMC cloud.
For information on getting access to Cadence iLS and other materials, please see https://www.cmc.ca/WhatWeOffer/Products/CMC-00200-05157.aspx.
You can review Cadence’s learning maps from the following URL: https://www.cadence.com/misc_pages/training_learning_maps/Master_Learning_Maps.pdf.
Getting Started
- Request access to the Cadence iLS course by following the instructions in https://www.cmc.ca/WhatWeOffer/Products/CMC-00200-05157.aspx.
- Get access to the CMC cloud. The access requirements can be viewed on the CMC cloud page. If you have not used the CMC cloud before, consult the Quick Start Guide: Using CMC cloud design environments.
Note: The CMC cloud is available to Designer and Prototyping Subscription holders.
- Create a CMC cloud Instance for Completing the Labs by following the instructions in the Quick Start Guide: Using CMC cloud design environments.
You should have created an instance for My Linux CAD Workstation, as shown in Figure 1.
Note: You can select to run the instance for up to five days. However, you can extend it longer than by following instructions on extending your instance in the Quick Start Guide: Using CMC cloud design environments.
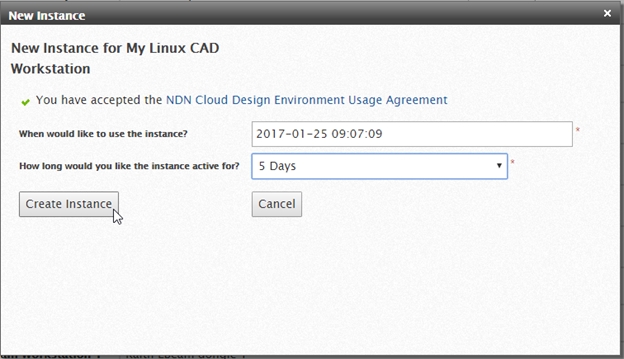
Figure 1: New Instance for My Linux CAD Workstation
Setting Up Your Environment
- When you have your instance running, make sure that you have access to Cadence by checking the CMC cloud My Access page, as shown in Figure 2.

Figure 2: CMC Could Research Group Access
- If you do not have Cadence in your CAD tool list, your team can get access from the Cadence University Software.
- To prepare your instance for running the Cadence software required in the lab, you need to source the appropriate setup script:
[vowain@razr-vm0-134 iLScourse]$ source /CMC/scripts/cadence.ic06.17.714.csh
- Follow the instructions in the Cadence iLS course and download the lab manual and files into your instance either from the web browser in the instance, or to your desktop.
If you download the files to your desktop, you can transfer them by following the Uploading and Downloading Files section of the Quick Start Guide: Using CMC cloud design environments.
- Extract the lab files into an appropriate working directory.
Important: You should select a directory in your mydata folder to ensure that you can have your course progress persist in the event that your CMC cloud instance expires.
- From your selected working directory, extract the lab files:
[vowain@razr-vm0-134 iLScourse]$ tar -xvf .tar.gz
Lab 2-1 Starting Virtuoso and Opening Your Designs
In this portion of the labs, you are prompted to cd ./Labs, but the copy extracted from the lab files contains the data from the instructor’s file system.
To make this work correctly in your CMC cloud instance:
Delete the existing Labs symbolic link:
[vowain@razr-vm0-134 iLScourse]$ rm Labs- Create a symbolic link to the directory the labs has one to:
[vowain@razr-vm0-134 iLScourse]$ ln -s design/custom_oa22/ Labs - Now you can successfully complete the step and run Virtuoso:
[vowain@razr-vm0-134 iLScourse]$ cd ./Labs
[vowain@razr-vm0-134 iLScourse]$ virtuoso & - Following the lab instructions, a popup is displayed, as shown in Figure 3, because the Cadence environment in the CMC cloud has the Layout GXL tools rather than the Layout L or Layout XL tools.
- Click Yes at the prompt until it opens or select Layout GXL from the File | Open dialog.

Figure 3: Virtuoso Layout L License Error
Lab 2-3 Using the Library Manager
In this lab in step 6, you are prompted to Enter (or browse to) libs.oa22/gpdk090/gpdk090.tf. You can browse to this from: <.tar.gz extract directory>/share/CDK090/gpdk090_v2.8_mod1/libs.oa22/gpdk090/gpdk090.tf. For example the full path to the file could look like the following:
~/mydata/iLS/DesignBasics/share/CDK090/gpdk090_v2.8_mod1/libs.oa22/gpdk090/gpdk090.tf
Lab 2-7 Floating the Palettes Away from Cellviews and Saving Workspaces
Important: In this lab in step 6, you are selecting the path to save your workspace. Selecting ./.cadence (i.e., .cadence is in the current working directory) puts the saved workspace layout in your current working directory, which from the steps earlier, is in your mydata folder. The saved file persists in future sessions. If you select the other option (e.g., /home/vowain/.cadence), as shown in Figure 4, the instance is saved in the home directory and will not persist for subsequent sessions.
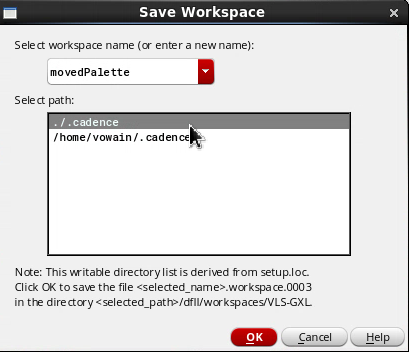
Figure 4: Layout GXL Save Workspace Dialog
Lab 3-3 Saving the Defaults
Similar to the previous note, step 1 of this lab prompts you to save the .cdsenv file in ~/.cdsenv. On the CMC cloud, to ensure consistency, save the file to ~/mydata/.cdsenv.
Lab 3-4 Using the Toolbar Manager
In the lab files on the CMC cloud there is no Ruler.png file. Use the file ruler-create.png that is in the default search directory.
Lab 4-1.1 Using the Create Via Command
This lab instructs you to work from the root project folder. However, to have the correct libraries available, you need to use the same directory as the other labs:
[vowain@razr-vm0-134 iLScourse]$ cd ./Labs
Lab 4-3.1 Using Search, Save/Restore, and the Navigator – Using the Navigator Assistant
The screenshot in the lab shows the option Open in, which is not present in the Virtuoso File | Open dialog in the CMC cloud (see Figure 5):
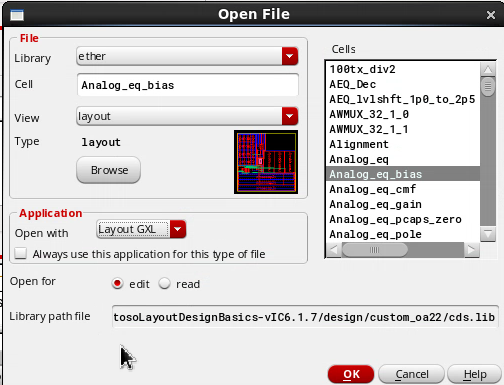
Figure 5: Virtuoso Open File Dialog
Also, the lab refers to the Navigator, which can be opened from the menu Window | Assistants | Navigator.
Lab 4-3.4 Remastering Instances – Remastering
In this lab, step 10 refers to the Property Editor assistant, you can access this from the menu Window | Assistants | Property Editor (see Figure 6).
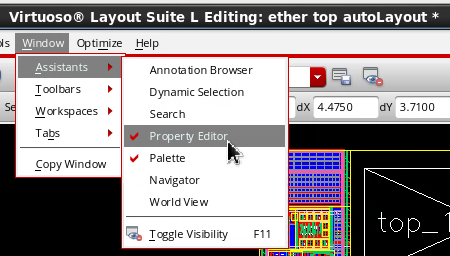
Figure 6: Accessing Property Editor Assistant
Lab 5-1 Running Interactive Routing Using DRD Editing – Using Create Wire with DRD to Make the Interconnect: DRD Editing
In this lab, step 3a suggests that the Gravity Controls section of the Layout Editor Options dialog has a pin checkbox. The version running in the CMC cloud does not have this option, as shown in Figure 7:
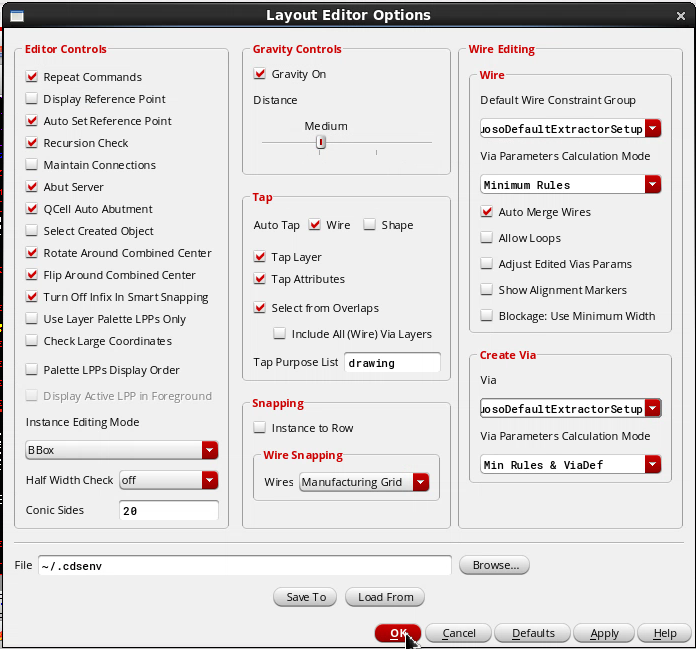
Figure 7: Layout Editor Options Dialog
Step 4d refers to a Save Via Variant button. The version of the tool running in the CMC cloud has a different button from the one shown in the lab manual, as shown in Figure 8:
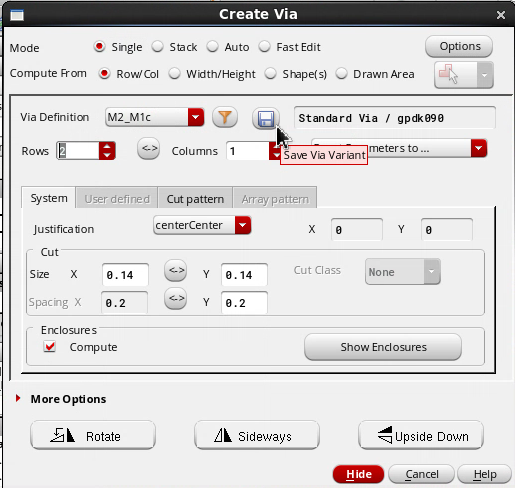
Figure 8: Create Via Dialogue Save Via Variant Button
Step 6d instructs you to select the new M2_M1_d via that you created. It does not specify that the M2_M1_d via is found as a sub-item to the M2_M1c via, as shown in Figure 9:
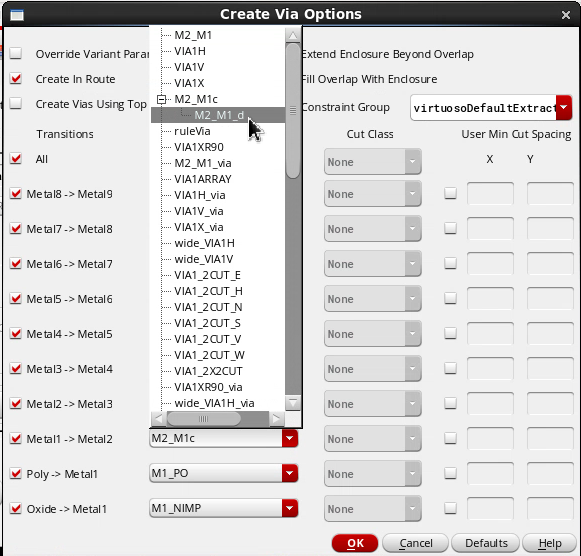
Figure 9: M2_M1_d via Location in the Create Via Options Dialog