Who Can Use the Revision Control System?
- GitLab in CMC cloud is enabled for all users who have a Subscription, see Requirements to Access Products & Services for more information.
- Important: If you do not use CMC cloud, but have a Subscription, you can still use CMC GitLab from anywhere over SSH or HTTPS.
What is the Distributed Revision Control System?
The distributed revision control system called GitLab, is available to CMC Subscribers. GitLab is a Git-based solution for managing project files for an individual or group using CMC credentials. This system is available from https://git.cmc.ca/.
Note: In addition to this guide, there is documentation on using GitLab provided at https://git.cmc.ca/help.
What is GitLab?
Git is the most widely used version control system and is frequently used in academia and industry. GitLab provides a convenient web interface so you can create and update projects from a browser if you do not have a Git client.
Why Use GitLab?
- Revision Control and History: CMC recognizes that protecting your IP and its development is a critical service that we can provide. CMC cloud revision control system allows you to keep a history of your design work completed using CMC cloud with the best tools available.
- Collaboration: CMC cloud revision control system is a great way to foster group contributions to a design project where the integrity of the group project is accurately tracked, stored, and protected.
Accessing CMC cloud Revision Control System
You can use any Git client to work with CMC cloud. This guide describes how to use the web client as well as the Git clients that are included in CMC cloud design environments for both Linux and Windows desktops.
First time Access
Note: Before using a git client, you need to authenticate GitLab using the web client. Use your CMC credentials to automatically set up your account.
Web Client Login Using Single Sign-On (SSO)
- Go to https://git.cmc.ca/. You will be redirected to the CMC SSO server where you can use your CMC credentials to access the web interface.
Projects
Note: All activities are described using the web interface. These actions are also possible through the command line interface when you become familiar with the daily usage of GitLab.
Creating a Project
To create a project:
- Select Projects from the menu.
- Click the button New Project (see Figure 1).
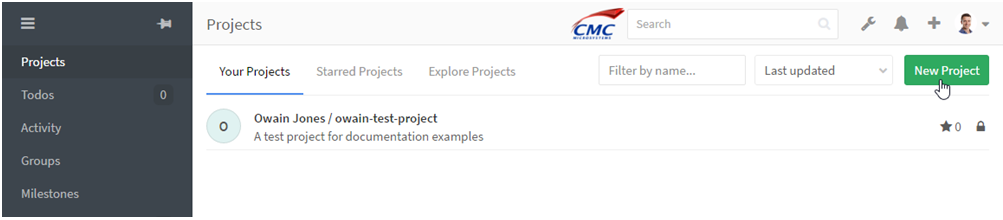
Figure 1: GitLab Projects
- Complete the Project name and Project description fields and select the Visibility Level of your project.
Note: The Public Visibility Level is disabled to prevent anonymous access to CMC cloud resources. - Click the button Create Project (see Figure 2).
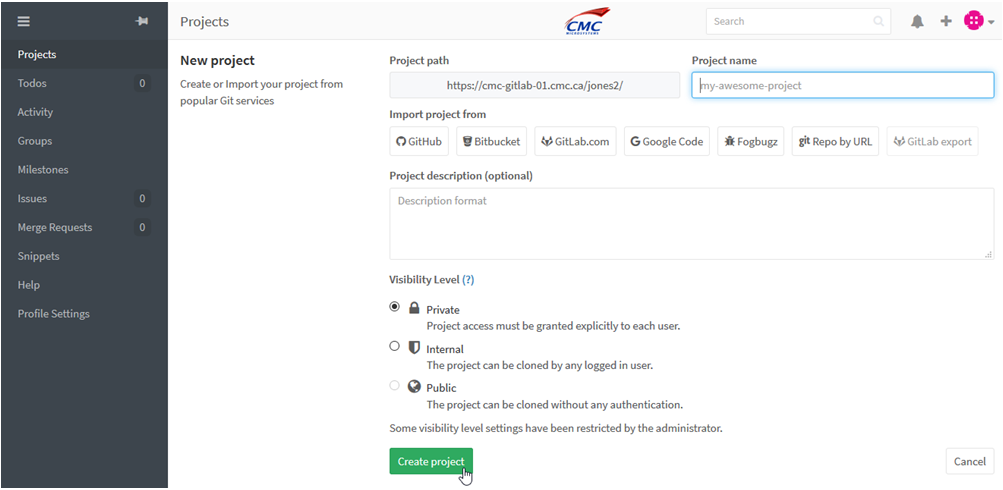
Figure 2: GitLab New Project
Adding Collaborators to a Project
To add collaborators to a project:
- From your project page, select the gear icon and click Members (see Figure 3).
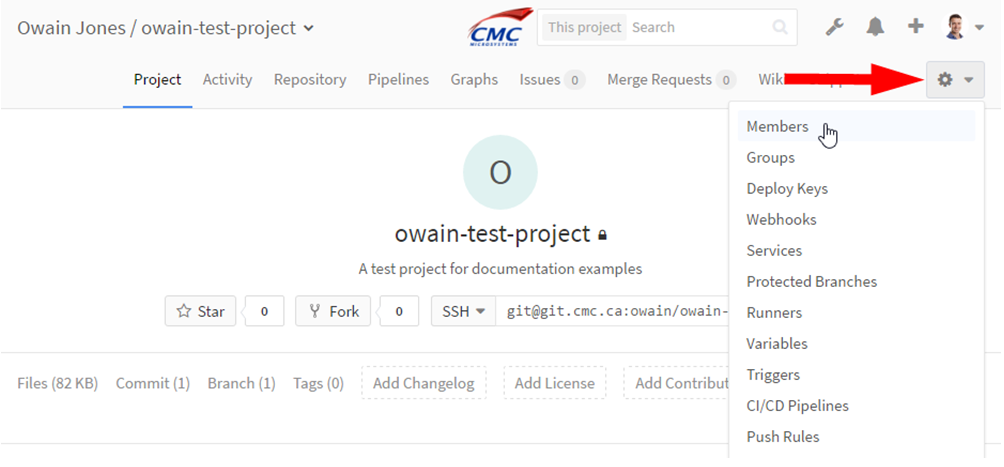
Figure 3: Project Members
- In the field Add new user to, search for the new members that you want to add.
- From the drop-down list, select the permission level that you want to assign to the new members.
Note: More information on what the permission levels do can be found here: https://git.cmc.ca/help/user/permissions).
- In the Expiration Date field, you can set an expiration date where the user(s) automatically lose access to the project.
- Click Add to project (see Figure 4).
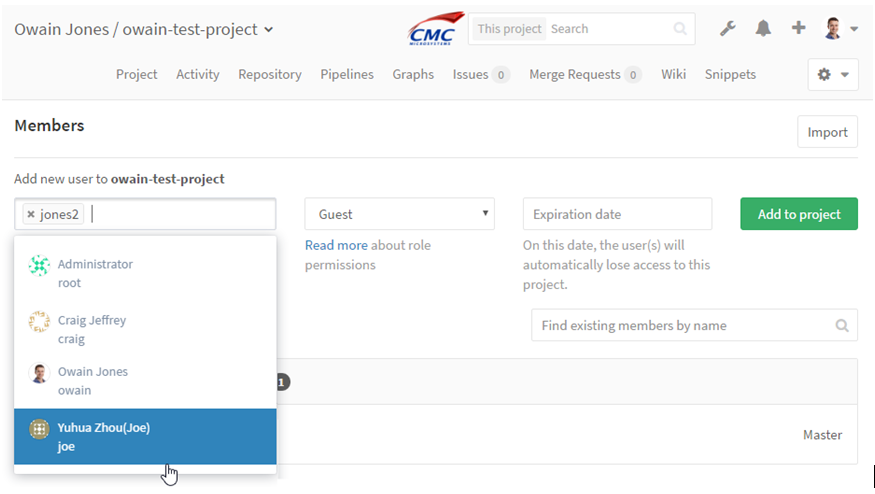
Figure 4: Add Members to a GitLab Project
Cloning a Project
To get an offline copy of your project files from GitLab, you can clone your project using either the web interface or SSH.
Downloading From the Web Interface
From your project page, click the icon Download and download the project in the archive format of your preference (see Figure 5).
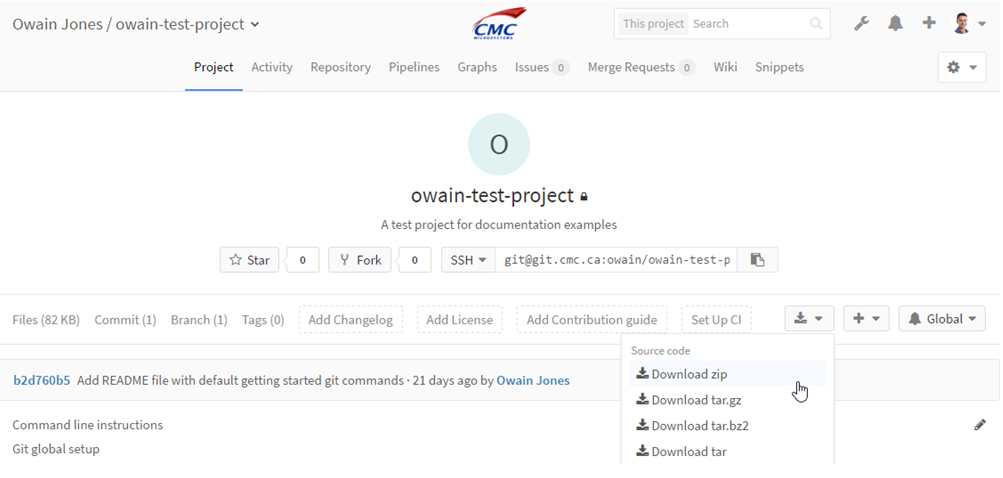
Figure 5: GitLab Web Project Download
Cloning From the Terminal Using CMC Credentials
Note: Before using SSH, ensure that you have logged in using the web access to initialize your account.
The commands in these instructions use an example project called owain-test-project. When you are running these commands, you should update the commands accordingly to reference your own project.
Note: The full LDAP path to your project for use in the commands can be retrieved from the web interface. Here, you can navigate to your project from the Projects menu option and then select HTTPS from the drop-down list, as shown in Figure 6.
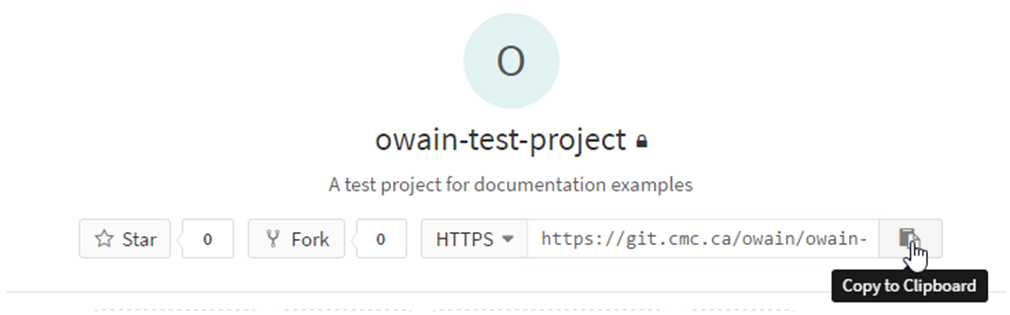
Figure 6: HTTPS Project Connection String
- In your terminal, execute the following command:
[vowain@razr-vm0-144 ~/Desktop]$ git clone https://git.cmc.ca/owain/owain-test-project.git
The clone operation starts and OpenSSH prompts for your username and password, as shown in Figure 7.
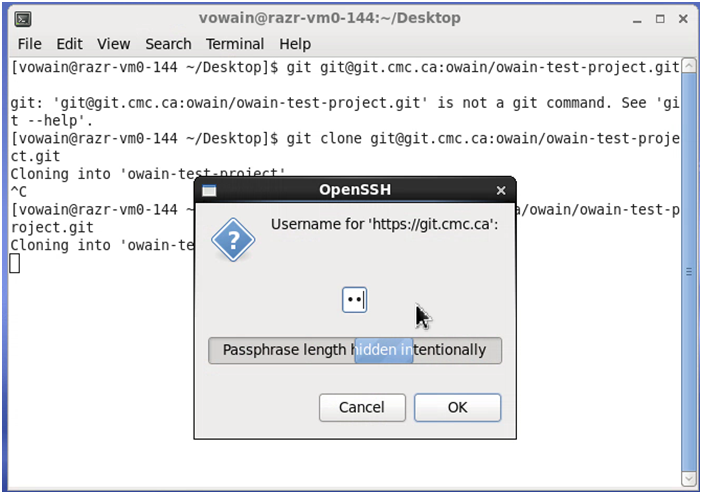
Figure 7: OpenSSH Git Authentication Prompt
- At the OpenSSH prompts, use your CMC credentials to authenticate and complete the operation.
A folder containing your project is created and you will see output similar to the following:
Cloning into ‘owain-test-project’…
remote: Counting objects: 3, done.
remote: Compressing objects: 100% (2/2), done.
remote: Total 3 (delta 0), reused 0 (delta 0)
Unpacking objects: 100% (3/3), done.
Checking connectivity… done.
Cloning From the Terminal using SSH with Private / Public Keys
Note: Using private / public keys is optional and are recommended when you become familiar with daily usage of GitLab.
To set up your CMC GitLab account to use SSH:
- Using the web interface, navigate to Profile Settings -> SSH Keys.
- Get your public SSH key that you want to add.
If you do not have one, see the following GitLab URL for details on generating one: https://git.cmc.ca/help/ssh/README.
- Paste your SSH key into the Key field.
- In the Title field, enter a friendly name for your SSH key.
- Click the Add key button, as shown in Figure 8.
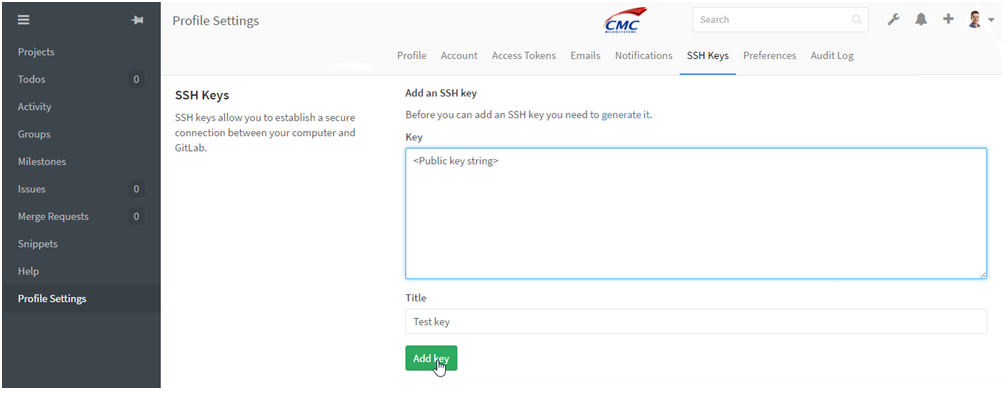
Figure 8: GitLab SSH Keys
- In the Project menu, from the SSH drop-down list, run the following command:
[vowain@razr-vm0-144 ~/Desktop]$ git clone -v git@cmc-gitlab-01.cmc.ca:owain/owain-test-project.git
Cloning into ‘owain-test-project’…
Cloning when Two-Factor Authentication (2FA) is Enabled
When you have enabled 2FA you can no longer use your normal account password to authentication with Git over HTTPS, you will need to use a Personal access token instead.
Committing Changes to a Project
If you want your updates to persist and become part of the project history (and not local history) you must commit your changes.
Important: Include comments in your commit so that, in the future, you can recall what your commit was.
The following example uses an existing file in the master branch called Example.cs.
Creating a Branch
Updating a source file cannot be done in the master branch so you must create a branch to change a file.
To create a branch:
- In the project page, select the sub-menu Branches and click the button New branch (see Figure 9).
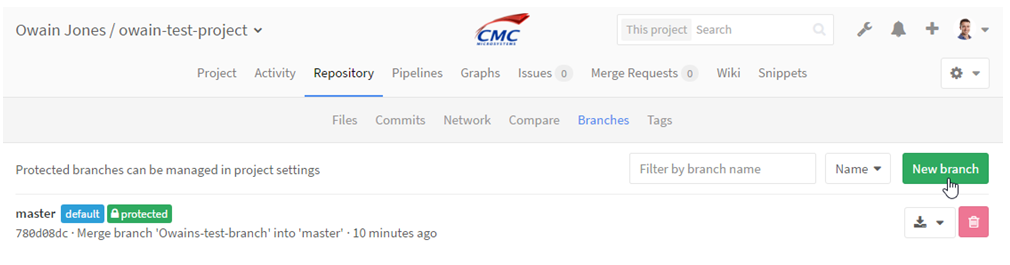
Figure 9: GitLab Project Branches
- In the New Branch page, enter a name for the branch in the Branch name field and select which existing branch to create the new branch from (in this case, master is the only branch).
- Click the button Create branch, as shown in Figure 10.
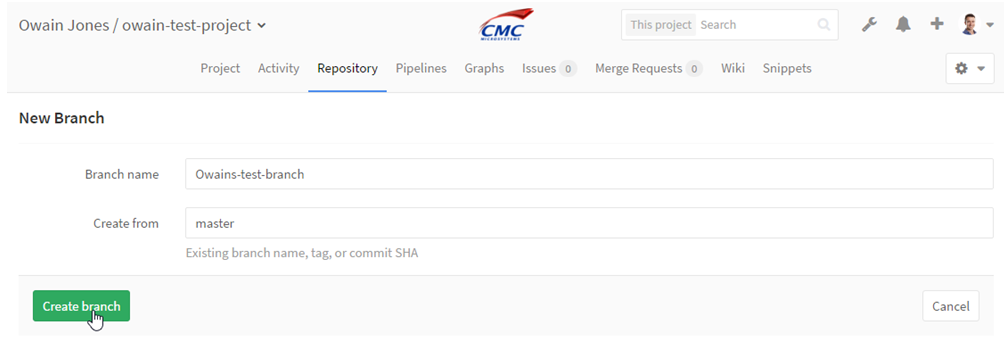
Figure 10: GitLab New Project Branch
Editing the Source File
To edit the source file:
- In your branch, navigate to the source file that you wish to change and click Edit (see Figure 11).
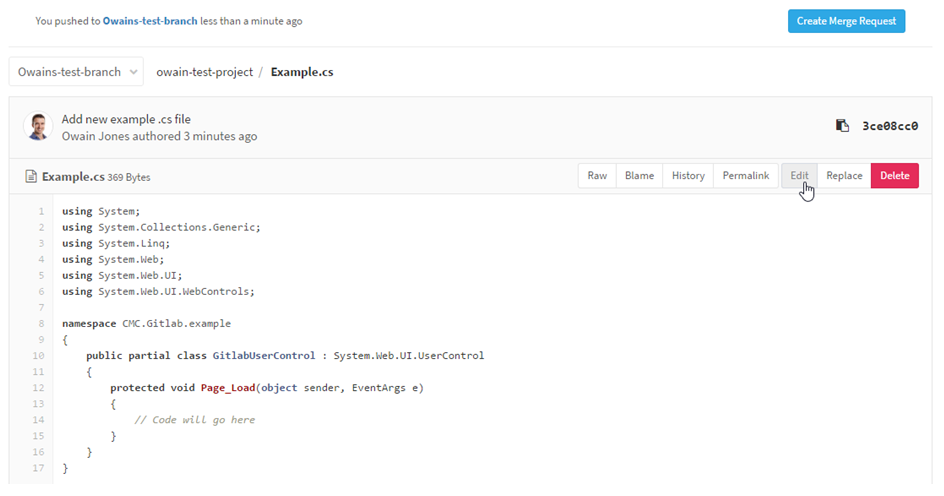
Figure 11: Editing a Source File in a Branch
- Using the web editor, edit your source file.
- When you are finished, commit your changes using the button Commit Changes, as shown in Figure 12.

Figure 12: Commit Changes
Create a Merge Request to Submit Changes to the Master Branch
After committing all of your changes to your branch, you can merge this branch back to the master branch using a merge request.
To create a merge request:
- From your branch view, click the button Create Merge Request, as shown in Figure 13.
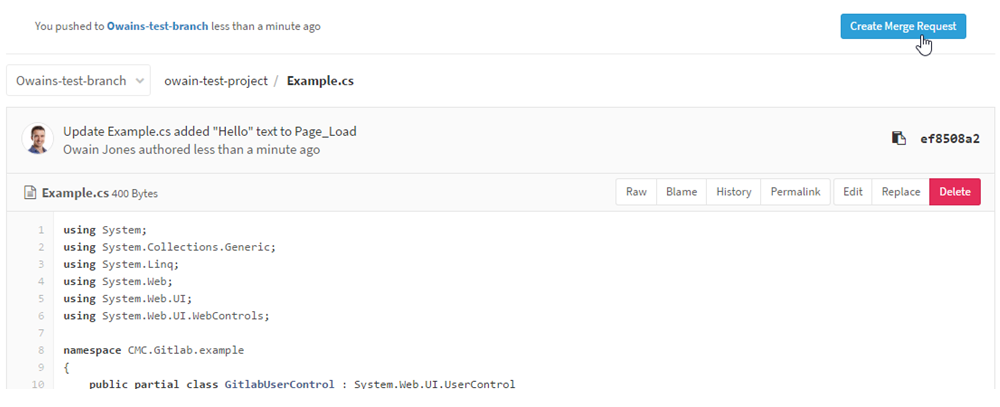
Figure 13: Create Merge Request
- In the Merge Request page, use the Assignee field assign the merge request to a project member who has permission to Merge.
Note: Different permissions can be reviewed here: https://git.cmc.ca/help/user/permissions.
- If your project has Milestones or Labels, you can assign them using the respective Milestone and Labels fields.
- Select your branch as the Source branch and the appropriate Target branch (in this case, it is the master branch).
- Click the button Submit merge request, as shown in Figure 14.

Figure 14: Submit Merge Request
Troubleshooting
Receiving “Fingerprint cannot be generated” Error When Adding SSH Key
You may experience this error when youcopy the generated SSH key from some text editor applications rather than using the ‘cat’ command that is in the instructions.
If you receive this error ensure that you are copying the key using the instructions in the document that is linked above.