CADpass client secure connection (will be referred to as CADpass client or CADpass in this document) is a utility provided by CMC Microsystems that creates a secure connection between client PC’s, workstations, and computer sessions, and the CMC managed infrastructure.
This quick start guide provides instructions for installing Siemens Tanner on a Windows system using CMC Microsystems’ CADpass (R20) to access shared licenses on the CMC License Management System (LMS).
Prerequisites
You must meet the following criteria before installing Siemens Tanner:
- Students must register with CMC at https://account.cmc.ca/MyAccount/MyAccount.aspx
- Faculty supervisors can subscribe through the CMC subscription page at https://www.cmc.ca/subscriptions/
- You must have administrator rights for the computer on which you are installing this software
- You must have a unique login name that does not contain a blank space. The following are examples of unacceptable login names: admin or administrator, root, super, sysadmin, user, owner, student, guest, temp, and system
System Requirements
Hardware Requirements
At least 4 GB of RAM is recommended, 10 GB of disk space
Software Requirements
OS requirements are Windows 10 or 11, 64-bit
Setting up CADpass client for Use with Siemens Tanner
CADpass client is a CMC Microsystems’ license access client and is used by subscribers across Canada to connect to our secure license server(s).
- Follow the instructions in the quick start guide to download and install CADpass client.
- Start CADpass client and then log in using your CMC Microsystems Username and Password.
- When the CAD access window appears, double-click Siemens (formerly Mentor).
A red checkmark appears next to the entry as shown in Figure 1. Leave this checked while you are using the software.
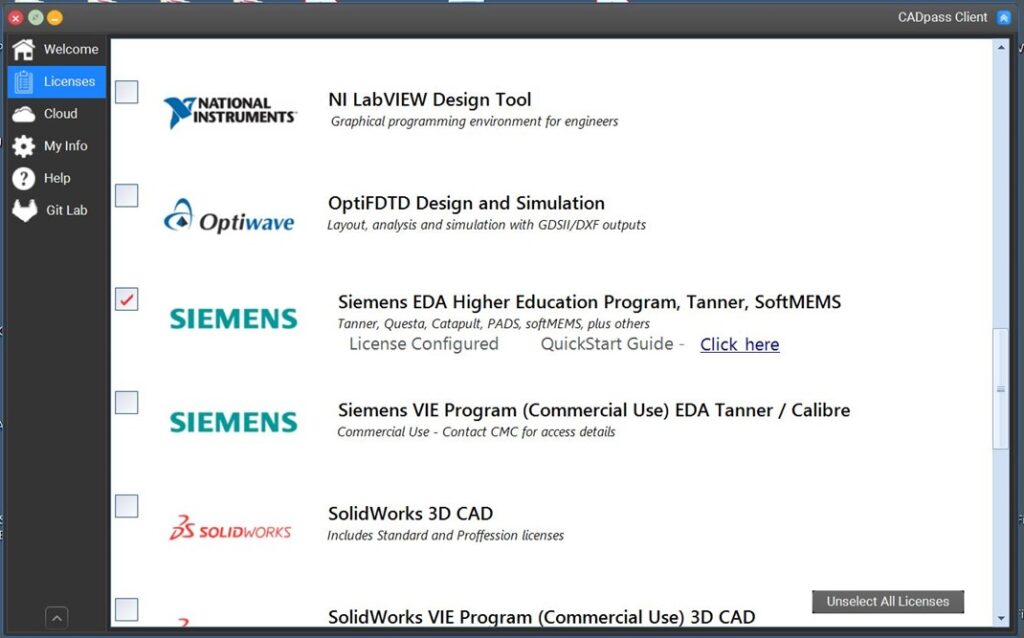
Figure 1: The Siemens EDA Selection in CADpass client
Obtaining the Software
- Download the Siemens Tanner tool from the CMC product page:
https://account.cmc.ca/WhatWeOffer/Design/Tools/DownloadTanner.aspx - Select the version of the tool to download.
This guide uses Tanner 2023.2 for Windows as an example.
Installing the Software
To install the tool:
- Open the folder where the file was downloaded.
- Double-click the file *.exe.
- Click Install | Install Products, as shown in Figure 2.
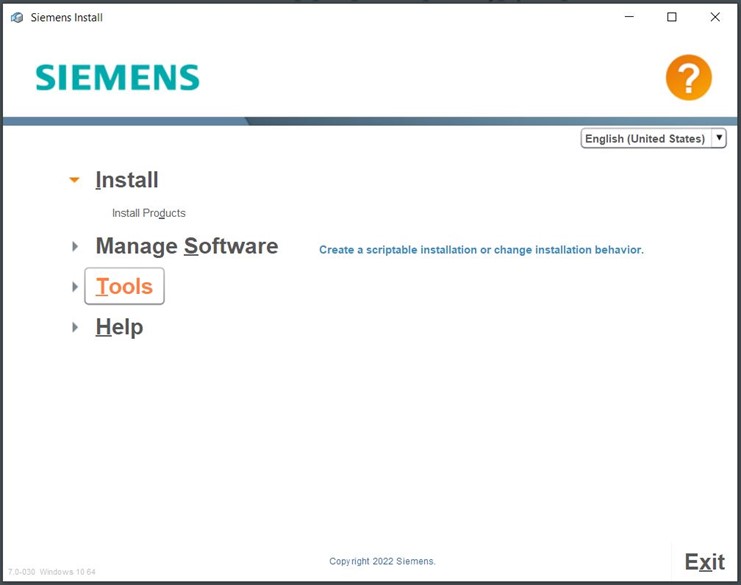
Figure 2: Install Products
- On the screen Source and Target, select a target location or leave it as the default, as shown in Figure 3.
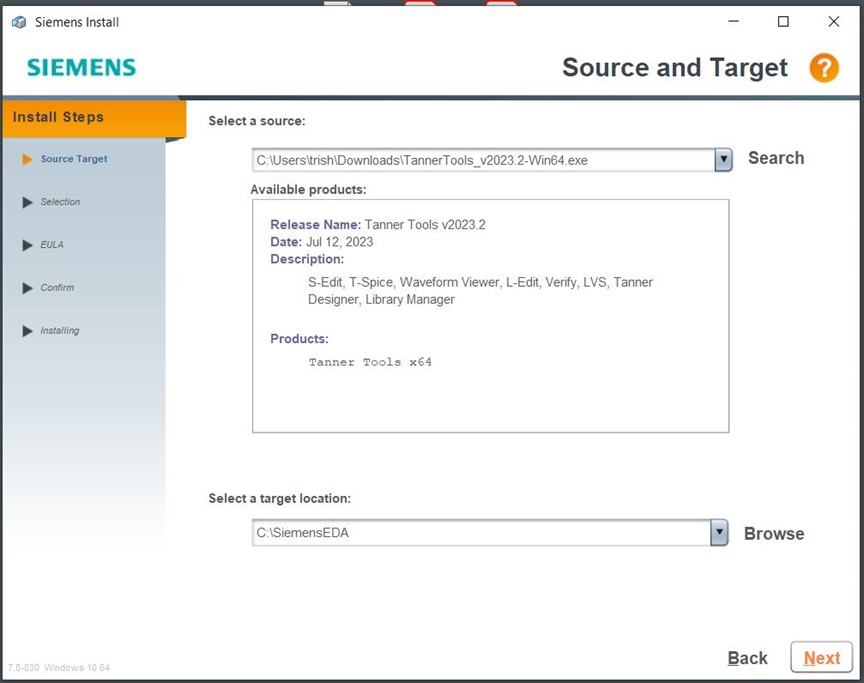
Figure 3: Select a Target Location
- Click Next.
- On the screen Product Selection, select the products that you want to install, as shown in Figure 4.
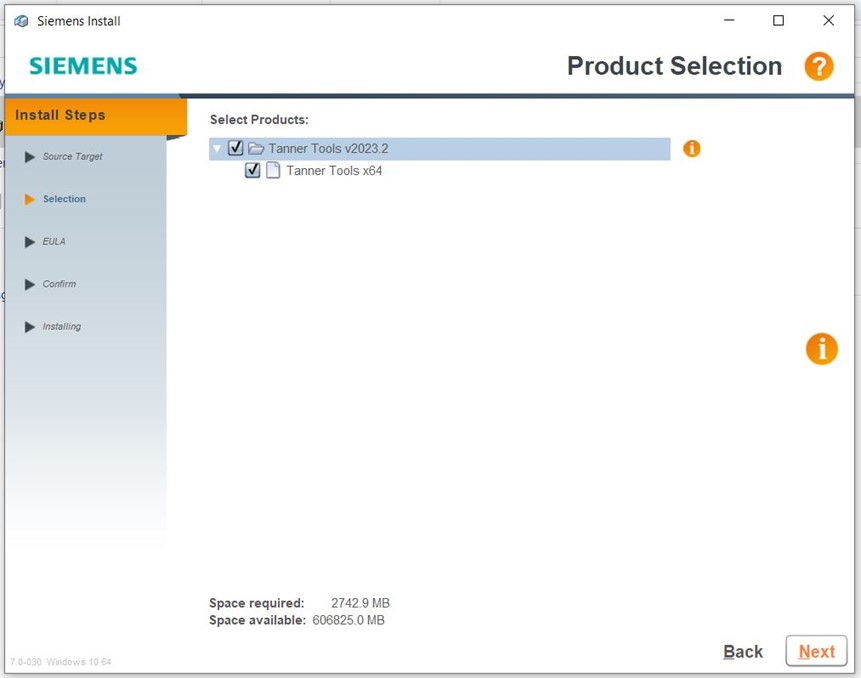
Figure 4: Product Selection
- Click Next.
- On the screen License Agreement, accept the license agreement by clicking Agree, as shown in Figure 5.
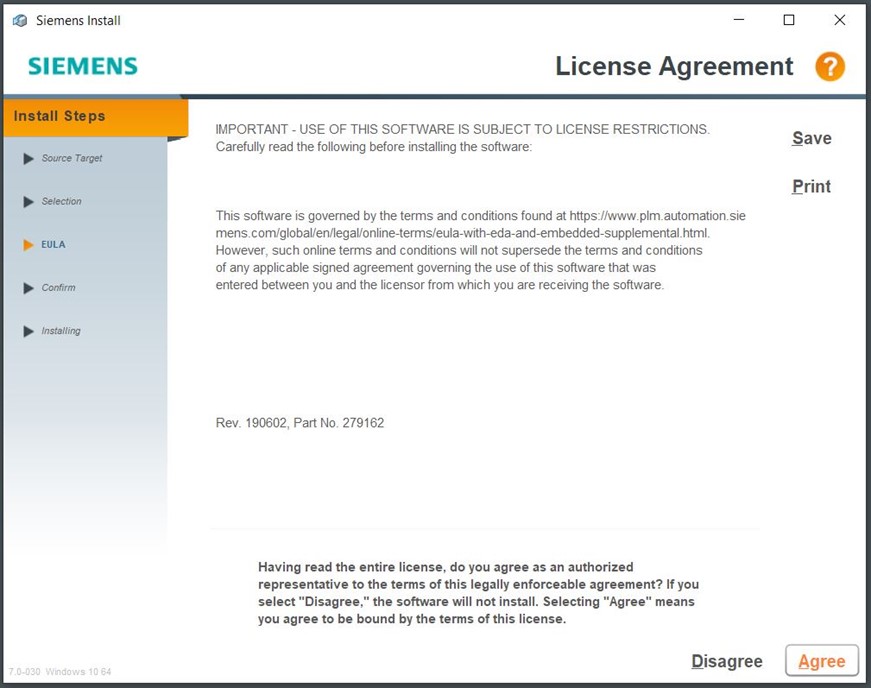
Figure 5: Accept the License Agreement
- On the screen Confirm Selections, confirm your selections and click Install, as shown in Figure 6.
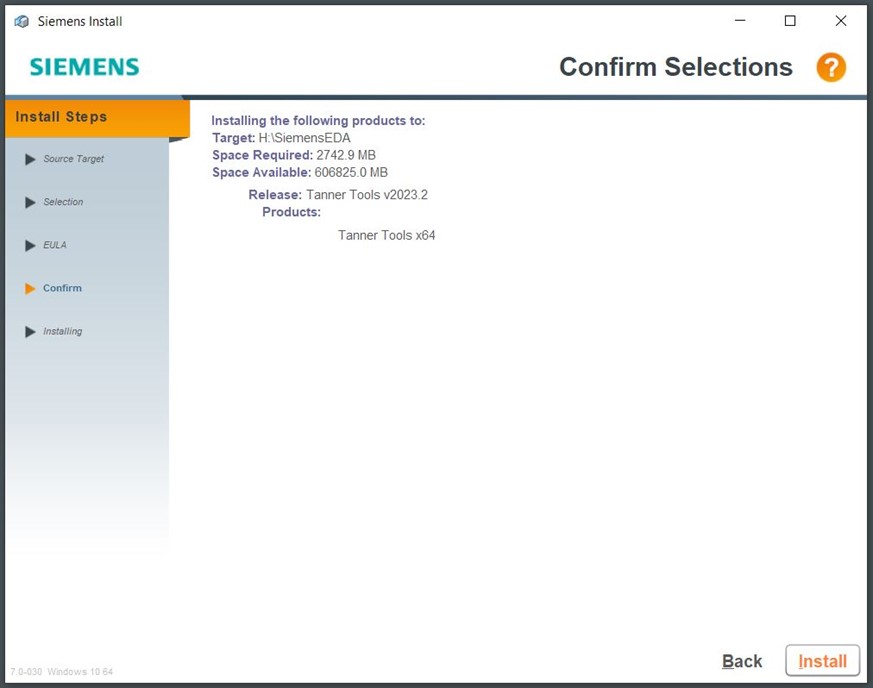
Figure 6: Confirm Selections
The Tanner Custom IC tool suite begins to install, as shown in Figure 7.
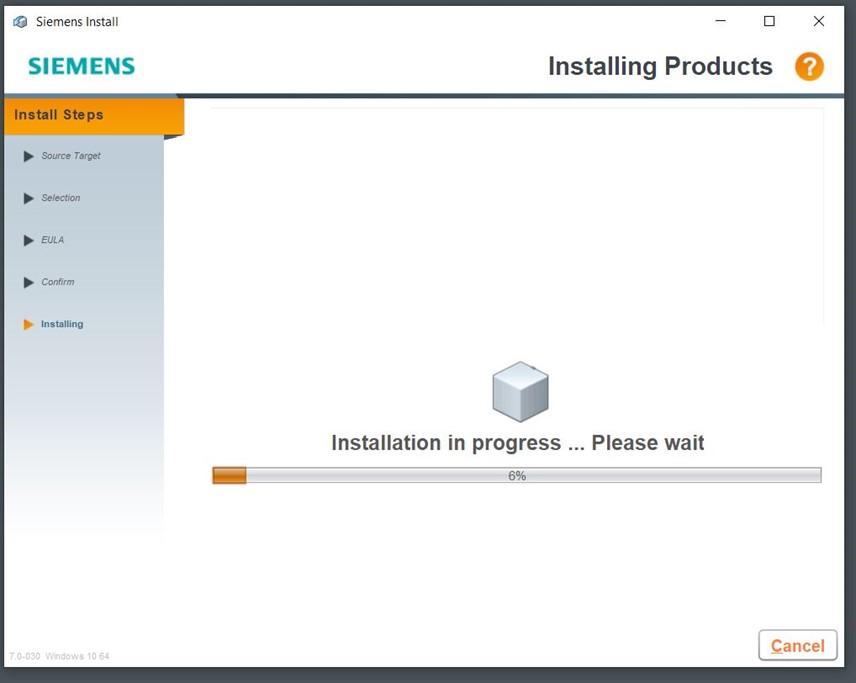
Figure 7: Install Products
- In the dialogue Desktop Shortcuts, you can create desktop shortcuts by clicking Yes, as shown in Figure 8.
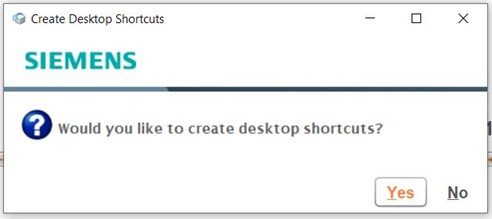
Figure 8: Desktop Shortcuts
- On the screen Installing Products, when the installation is complete, click Done, as shown in Figure 9.
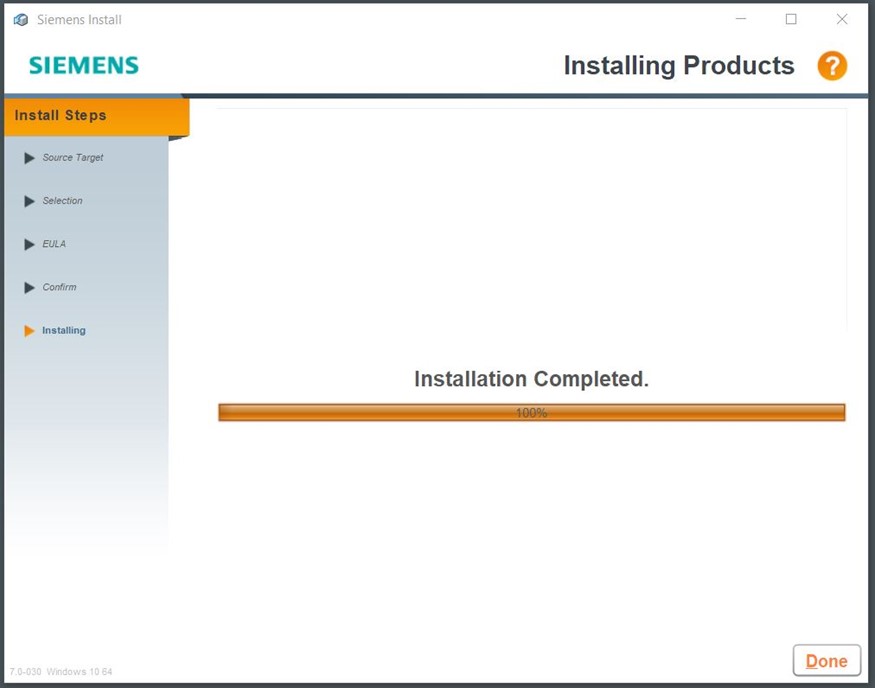
Figure 9: Installation Complete
After the installation is complete, the menu Install is displayed.
- Click Exit, as shown in Figure 10.
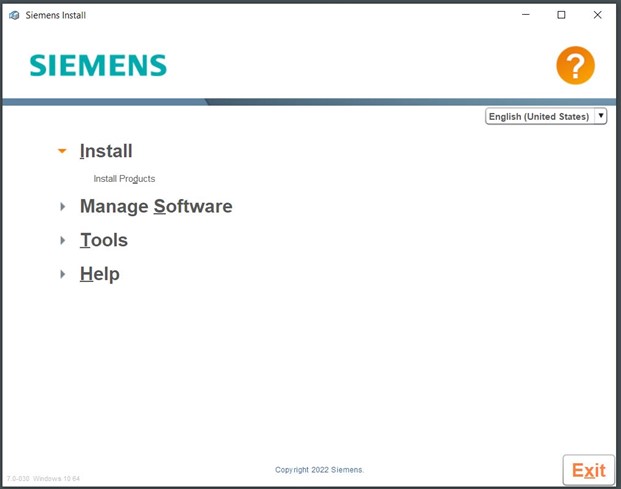
Figure 10: Exit the Installation
Running the Software
Ensure CADpass is running and that you have a good connection to CMC Microsystems’ licence servers.
From the desktop or Start Menu (“Mentor Graphics”), click the tool icon or entry (L-Edit IC, L-Edit Photonics, L-Edit MEMS, etc.) to run the tool that you want to use.
If there is an error message regarding licensing, ensure that CADpass client is running and that the Siemens icon has a red checkmark, as shown in Figure 1 above. Open a support case with CMC staff if you continue to struggle with this installation.
Examples and user manuals are available from the Tanner Help pull-down menu.