Introduction
CMC Microsystems provides a variety of virtual, on-demand, and secure cloud-based design environments. This set of environments includes CAD tool suites, Process Design Kits (PDKs), and an FPGA/GPU cluster. The FPGA/GPU cluster is specifically configured to enable research and development in the area of heterogeneous computing and machine learning acceleration using FPGAs and GPUs accelerators. A full description of the cluster can be found at https://www.cmc.ca/fpga-gpu-cluster/.
This quick guide provides instructions on how to reserve, access, manage, and use the FPGA/GPU cluster nodes through the CMC cloud environment interface.
Helpful Resources
The following is a list of materials that can help you familiarize with the FPGA/GPU cluster:
Getting Started
Logging in
- Go to https://vcad.cmc.ca/.
- Log in using your CMC registered email address.
Accepting the Usage Terms and Conditions
In the CMC cloud design environments, “Instance” relates to the lifetime of the virtual machine that is being requested by you in the environment. You can connect to a single instance multiple times, and it is still considered a single instance.
When you create an instance for the first time, you will need to accept the CMC Environment Usage Agreement.
- Review the agreement and accept it by checking the box
I have read and accepted these usage terms and conditions. - Click Submit, as shown in Figure 1.
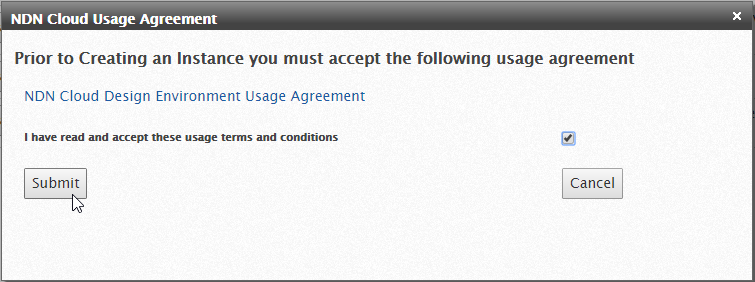
Figure 1: CMC cloud Usage Agreement
Creating “My Instance”
There are three different environments available; Accel – Cerebro, Accel – Genisys, and Accel – Synergy, as listed in Figure 2. For each environment, the column Description describes the machine learning capabilities and framework, available development software, as well as the available accelerators within the node. For example, when you reserve a node from Accel – Cerebro, you will access a node integrating two Alveo 200 FPGAs with a full machine learning software stack, including TensorFlow, Caffe, and PyTorch.
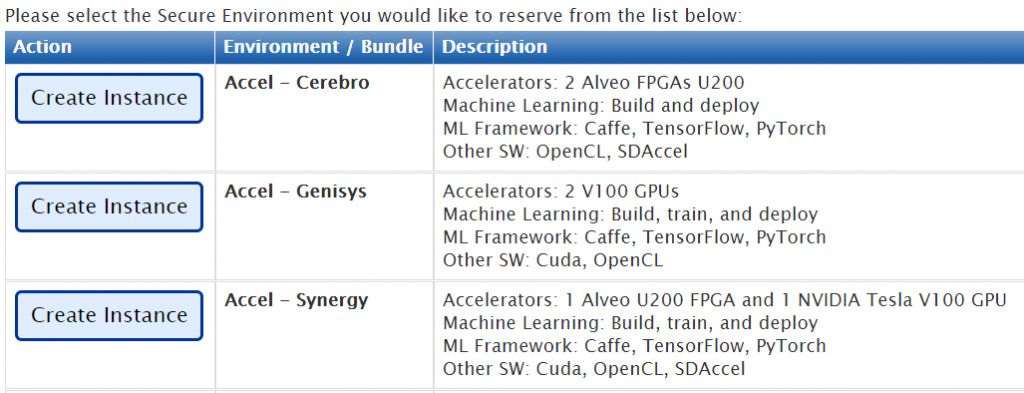
Figure 2: Create Instance Window
As an example, this guide will work with the environment Accel – Synergy.
- To create a new Instance, click Create Instance next to Accel – Synergy, as shown in Figure 2.
The dialogue New Instance appears, as shown in Figure 3.
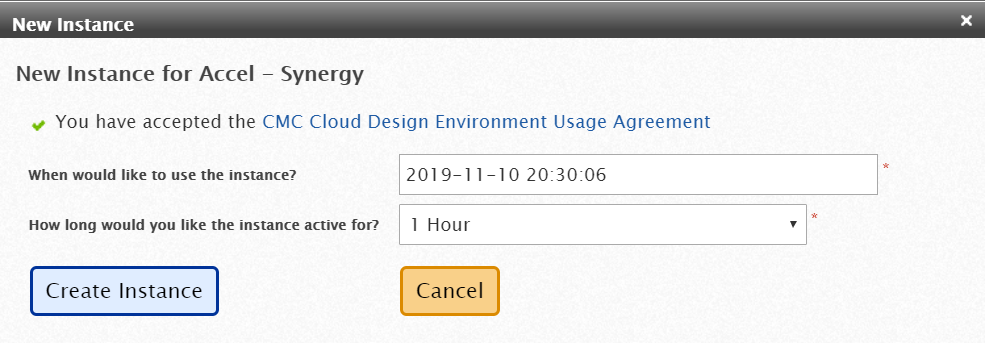
Figure 3: Reservation of a New Instance of Accel – Synergy
- Enter the start time (default is Immediately) and How long would you like the instance active for. See an example in Figure 3.
Note: Ensure the instance duration is long enough to finish your work. If your instance expires, the entire session will be reset.
- Click Create Instance.
Managing “My Instance”
After creating the instance, you are redirected to the tab Manage My Instance, as shown in Figure 4.

Figure 4: Manage My Instance
Note: If you leave the web application, you can return to your instances list by clicking the tab Manage My Instance, as shown in Figure 4.
Retrieving Connection Information
To retrieve your connection information, from the tab Manage My Instance, click Connect.
Note: It may take several minutes to display the connection information that is similar to the example shown in Figure 5.

Figure 5: Connection Information
Connecting to “My Instance”
The dialogue Connect to your instance lists all the methods you can use to connect to your instance. In the example shown in Figure 5, you can connect to this environment using SSH for Linux & Unix.
Note: Only an ssh connection is required to run any machine learning framework available in the FPGA/GPU cluster.
- Click Open Terminal (ssh).
The file MobaXterm will be downloaded. It is a shortcut to the ssh session of the instance you just created.
- To open an ssh session on MobaXterm, double-click the file MobaXterm.
An ssh session is opened, as shown in Figure 6.
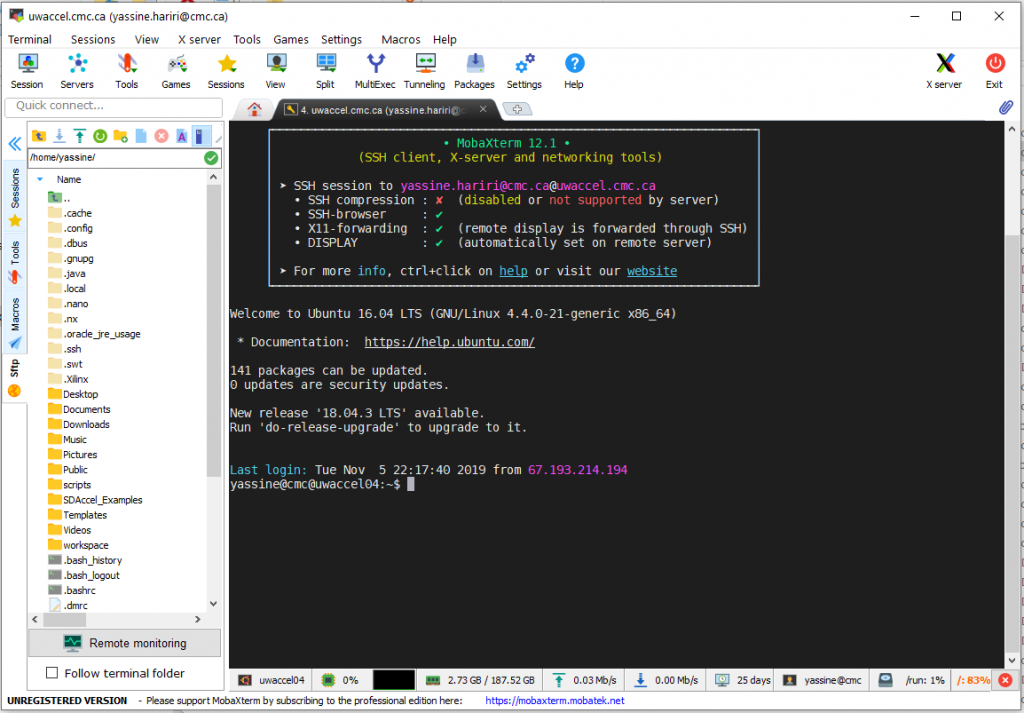
Figure 6: ssh Session to Your Instance
At this point, you can start developing your machine learning projects using the available frameworks. For more information, refer to [1], which describes how to use the Caffe machine learning framework targeting the FPGA/GPU cluster.
Extending “My Instance”
To extend the duration of your instance:
- Go to https://vcad.cmc.ca/ and click the tab Manage My Instance.
- Next to the instance that you wish to extend, click Extend, as shown in Figure 4.
The dialogue Extend secure instance appears, as shown in Figure 7.
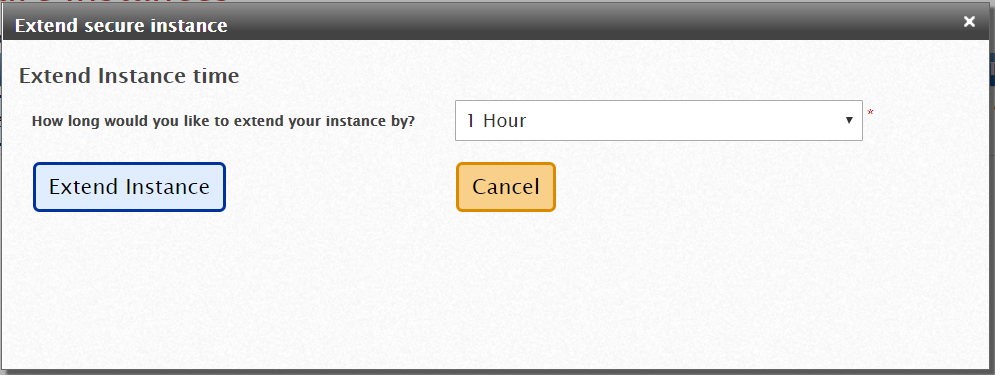
Figure 7: Extend Your Instance
- Select the time you wish to extend the instance for and click Extend Instance, as shown in Figure 7.
Deleting “My Instance”
To delete your instance:
- Got to https://vcad.cmc.ca/ and click the tab Manage My Instance.
- Click Delete, and then OK, as shown in Figure 8.
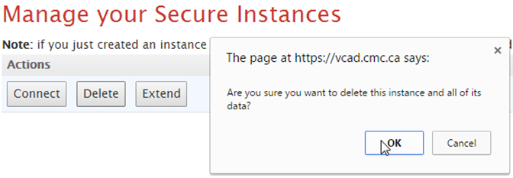
Figure 8: Delete Your Instance
Uploading and Downloading Files
You may drag and drop your files between CMC cloud and your local system, as shown in Figure 9.
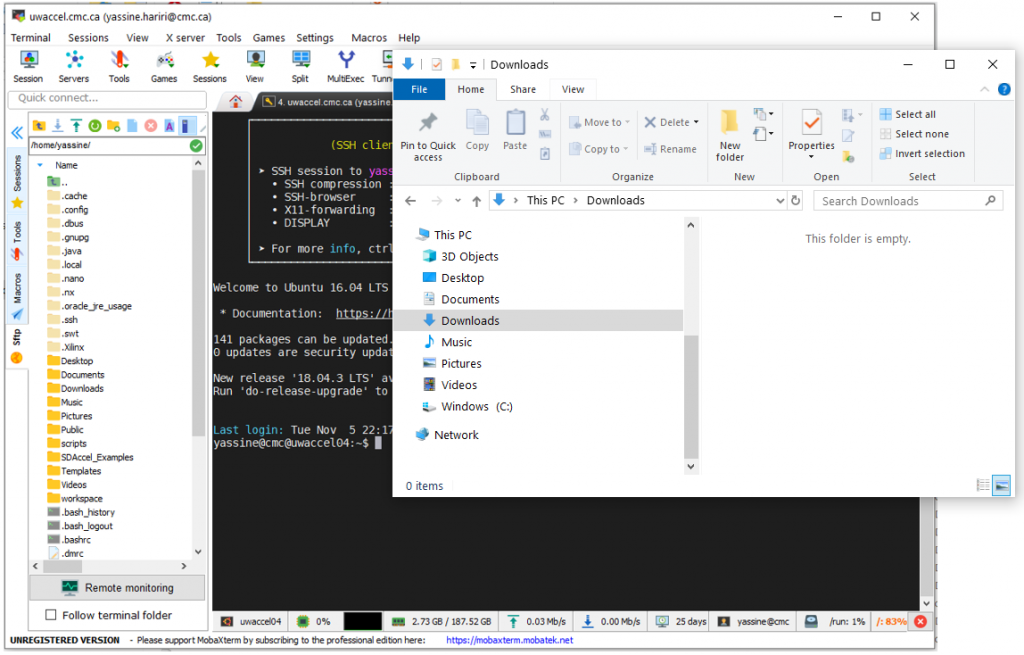
Figure 9: Uploading and Downloading Files
Your Home Directory
The folder /home/your.user.name that is available in any ssh session you created is your persistent storage. All data that you store on this directory is available to you across the whole cluster.
Technical Support
If you experience any issues when working through these steps, contact Yassine Hariri at CMC Microsystems at [email protected] or 613-530-4672. You can also file a support case using the Support Form.
References
[1] Yassine Hariri, “Tutorial and User Guide: Deep Learning Training and Inference Acceleration on the FPGA/GPU Cluster (ICI-377),” CMC Microsystems, product number: CMC-00200-05917, Oct. 2010. [Online] Available: http:// products.cmc.ca