CADpass client secure connection (will be referred to as CADpass client or CADpass in this document) is a utility provided by CMC Microsystems that creates a secure connection between client PCs, workstations, and computer sessions, and the CMC-managed infrastructure.
This quick start guide provides instructions for installing Siemens Custom IC Tools (formerly Tanner tools) on a Windows system using CMC Microsystems’ CADpass (R20) to access shared licenses on the CMC License Management System (LMS).
Prerequisites
- Professors, Research Supervisors, and their research teams must register with CMC at https://fabricinnovation.ca/member/.
- Professors and Research Supervisors can subscribe through the CMC subscription page at https://www.cmc.ca/subscriptions/.
- You must complete all required agreements for Ansys software use, which may be obtained from CMC Technical Support.
- You must have administrator rights for the workstation on which you are installing this software.
- You must have a unique login name (Linux or Windows) that does not contain a blank space. A username such as “charlie brown” contains a space, while usernames such as “charlie.brown” or “charlie_brown” do not contain spaces.
The following are examples of unacceptable login names because they are not unique: “admin”, ”administrator”, ”root”, ”sysadm”, ”user”, ”owner”, ”student”, ”guest”, “temp”, and ”system”.
System Requirements
Hardware Requirements
At least 4 GB of RAM is recommended, 10 GB of disk space
Software Requirements
OS requirements are Windows 10 or 11, 64-bit
Setting up CADpass Client for Use with Siemens Custom IC Tools
CADpass client is a CMC Microsystems’ license access client and is used by subscribers across Canada to connect to our secure license server(s).
- Follow the instructions in the quick start guide to download and install CADpass client.
- Start CADpass client and then log in using your CMC Microsystems Username and Password.
- When the CAD access window appears, double-click Siemens (formerly Mentor).
A red checkmark appears next to the entry, as shown in Figure 1. Leave this checked while you are using the software.
Obtaining the Software
- Download the Siemens tool from the CMC product page:
https://account.cmc.ca/WhatWeOffer/Design/Tools/DownloadTanner.aspx - Select the version of the tool to download.
This guide uses Tanner 2023.2 for Windows as an example.
Installing the Software
To install the tool:
- Open the folder where the file was downloaded.
- Double-click the file *.exe.
- Click Install | Install Products, as shown in Figure 2.
- On the screen Source and Target, select a target location or leave it as the default, as shown in Figure 3.
- Click Next.
- On the screen Product Selection, select the products that you want to install, as shown in Figure 4.

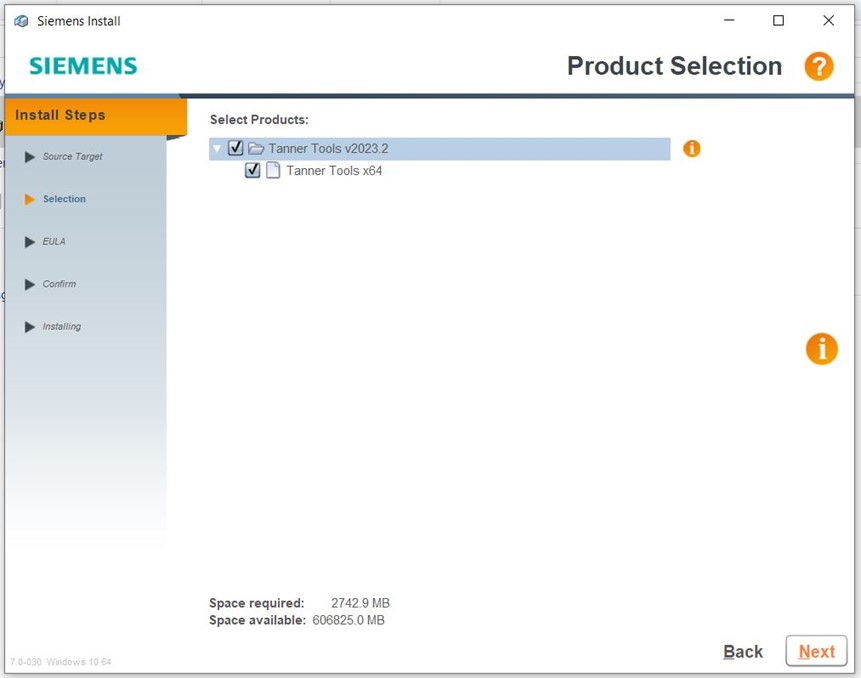
Figure 4: Product Selection
- Click Next.
- On the screen License Agreement, accept the license agreement by clicking Agree, as shown in Figure 5.

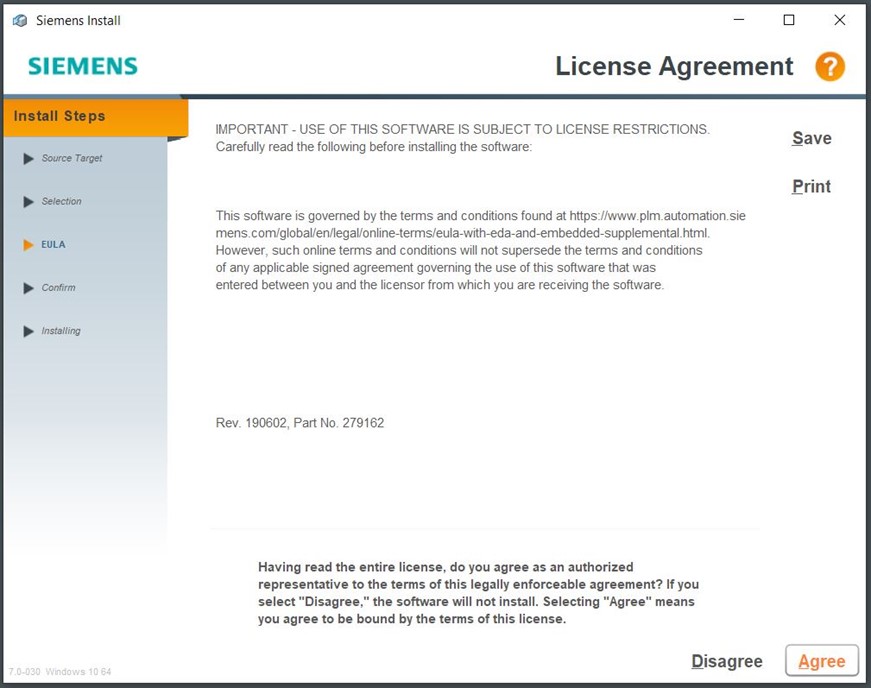
Figure 5: Accept the License Agreement
- On the screen Confirm Selections, confirm your selections and click Install, as shown in Figure 6.

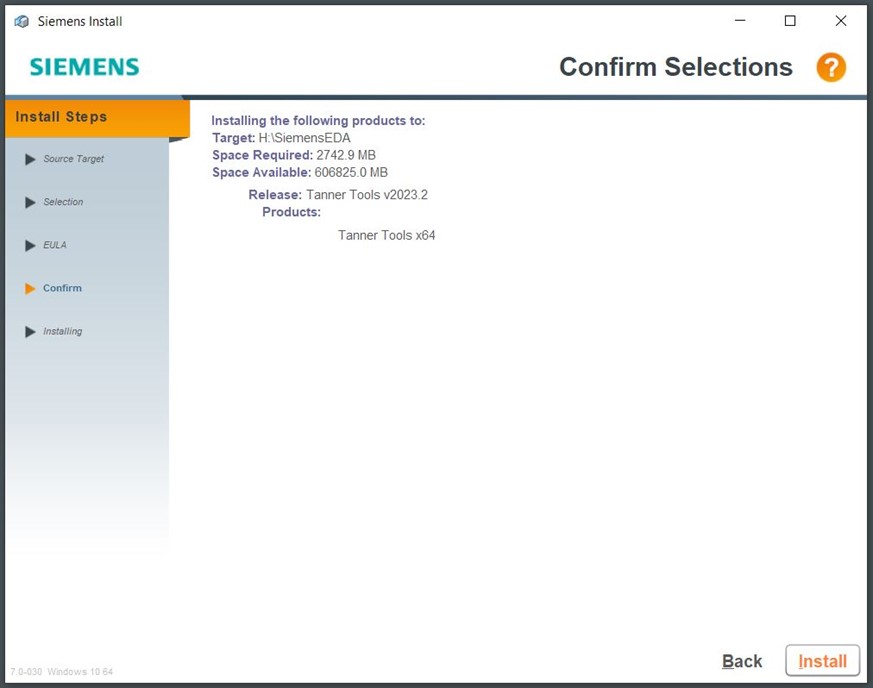
Figure 6: Confirm Selections
The Tanner Custom IC tool suite begins to install, as shown in Figure 7.
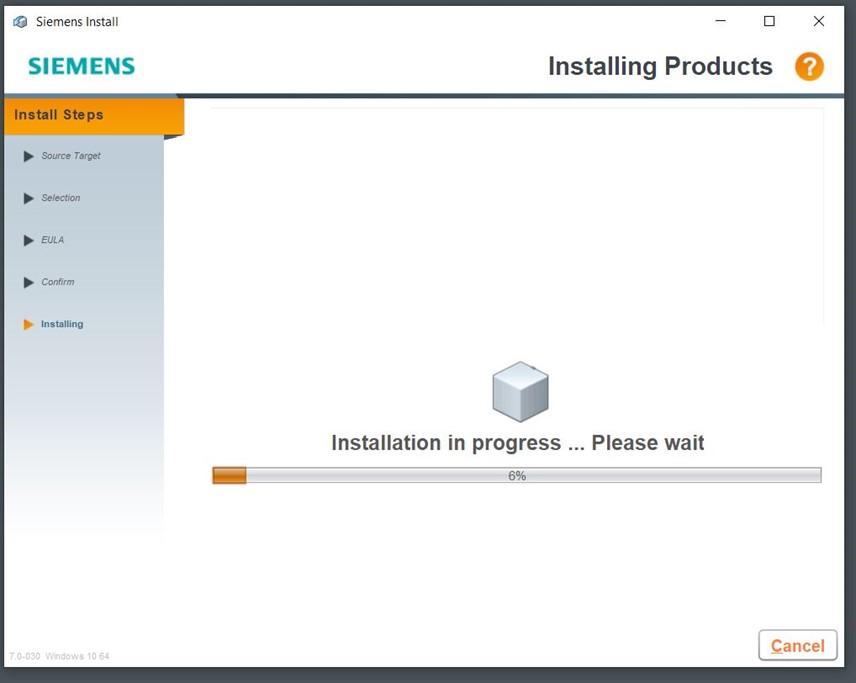
Figure 7: Install Products
- In the dialogue Desktop Shortcuts, you can create desktop shortcuts by clicking Yes, as shown in Figure 8.

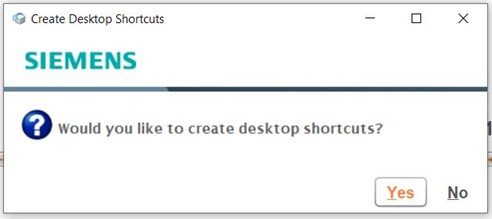
Figure 8: Desktop Shortcuts
- On the screen Installing Products, when the installation is complete, click Done, as shown in Figure 9.

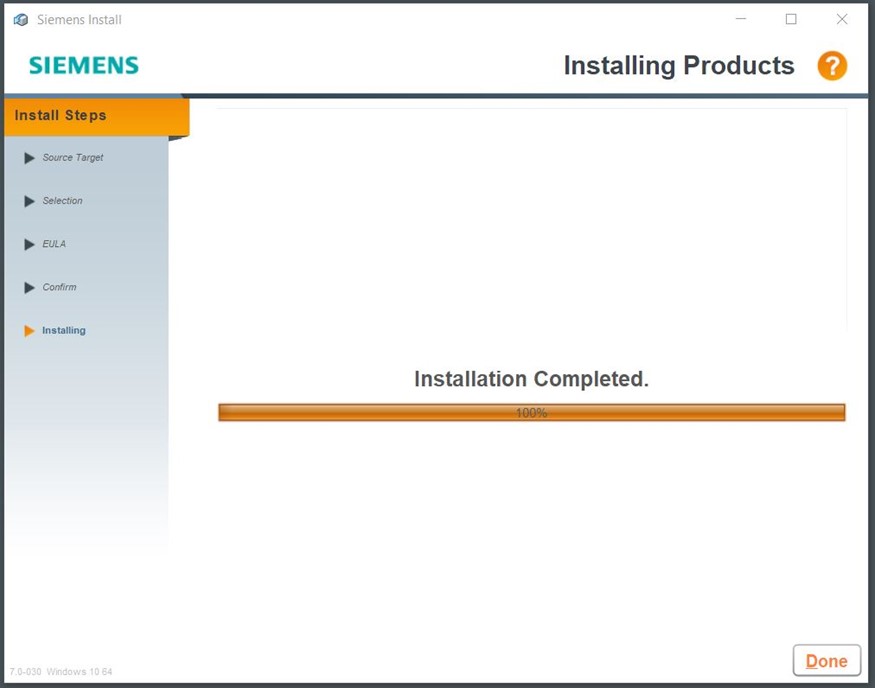
Figure 9: Installation Complete
After the installation is complete, the menu Install is displayed.- Click Exit, as shown in Figure 10.

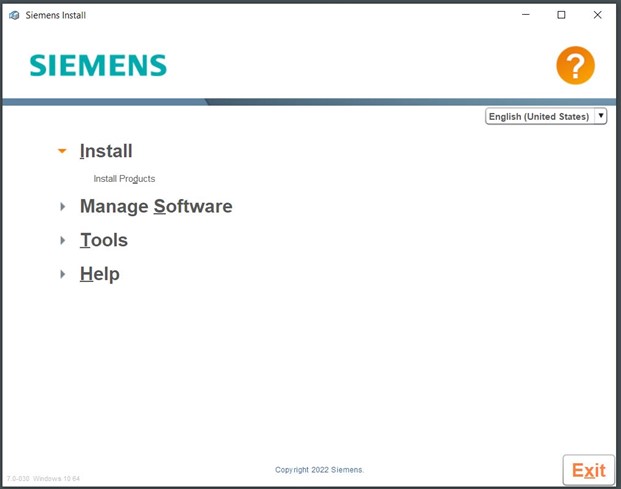
Figure 10: Exit the Installation